How to turn job photos into an Instagram Reel: a step-by-step guide for contractors
You already have the photos of your best jobs. This guide is the whole process for turning them into a 20 second Reel that homeowners watch to the end, step by step, with a finished pool job as the example.
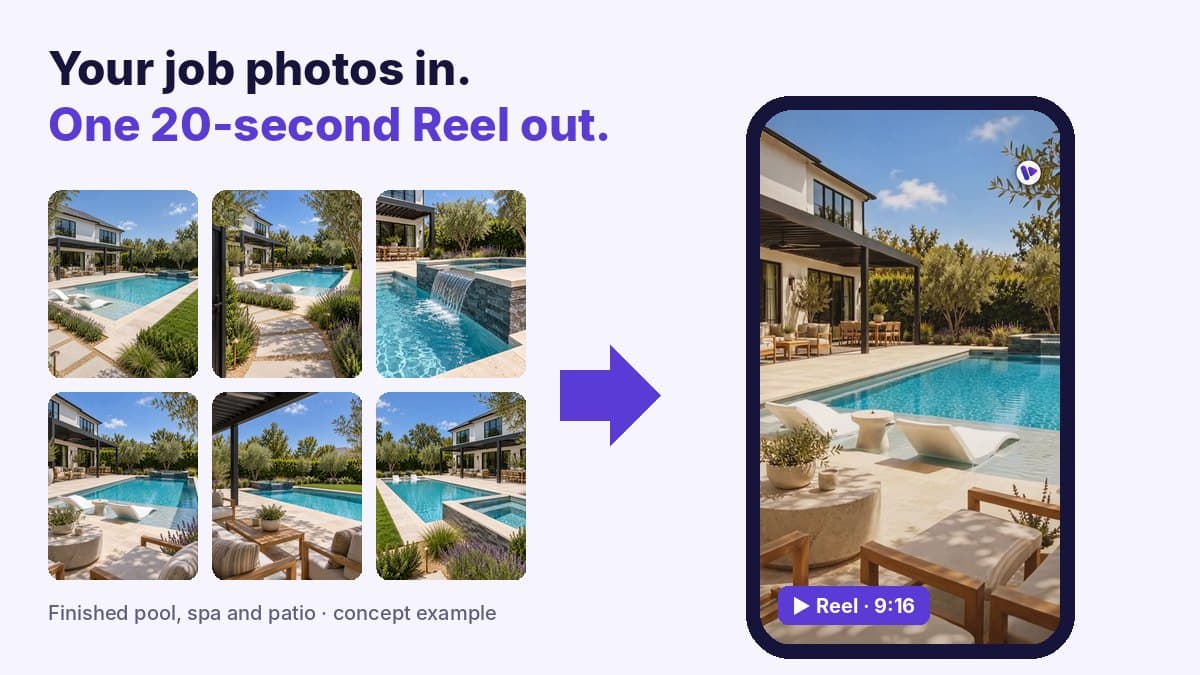
A Reel of a finished job does three things a photo post does not. Instagram and Facebook show it to homeowners who do not follow you yet, people watch it to the end because something moves in every shot, and clients share it because it is their house. That is why the busiest contractor accounts post a reveal for every job they are proud of.
Most contractors never make one, because it sounds like filming and editing. It is neither. A good reveal Reel is 6 to 10 photos you already take at handover, put in the right order, with movement, music and a closing card. Here is the process.
Step 1: Pick the job
Not every job deserves a Reel. Pick the one a buyer would want to see before they call you:
- Finished, not almost finished. No tape, no tools, no missing fixtures. Wait for the furniture and the plants if they are coming.
- The kind of job you want more of. If you want more pool, spa and patio packages, show one. A Reel brings calls for whatever it shows.
- Recent. A job from last month makes a better story than one from three years ago, and the client is still excited about it.
- The client said yes. Ask at handover: "Mind if we share a video of the finished job? We don't show the address." Almost everyone says yes, and many ask for a copy.
Step 2: Shoot the six shots that make a Reel
This is the step that decides how good the Reel will be. You need six kinds of shots, and you can take all of them in 15 minutes at handover. Shoot a few of each so you can pick the best one later.
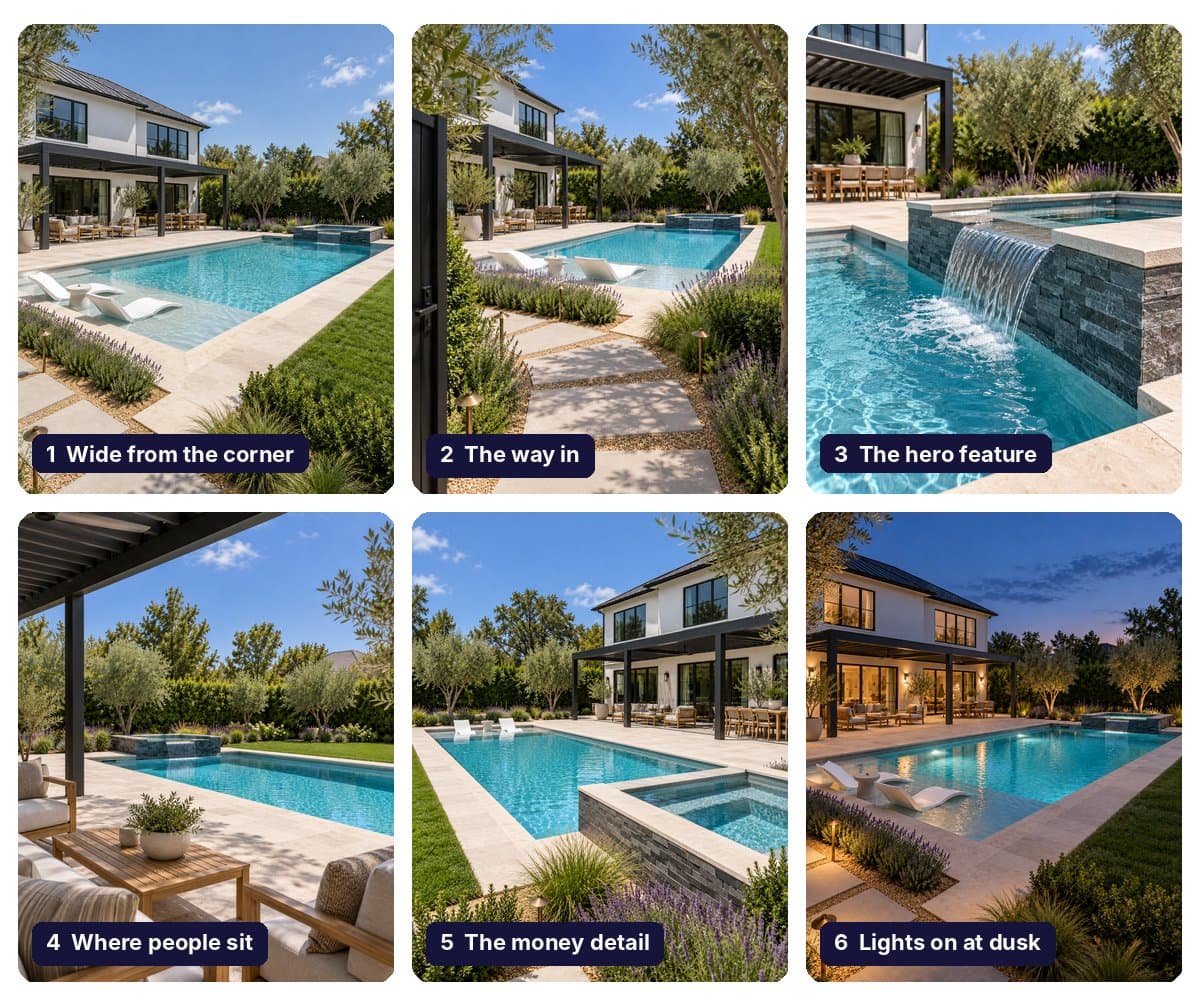
- Wide from the corner. Stand in a corner of the yard or room and get the whole job in one frame. This is the shot that opens and often closes the Reel.
- The way in. What a guest sees walking up: the path to the pool, the doorway into the kitchen, the gate to the patio. It makes the viewer feel like they are arriving.
- The hero feature. The thing the client paid extra for. A sheer descent, an island, a fire pit, a walk-in shower. Shoot it straight on, filling most of the frame.
- Where people sit. The lounge chairs, the bar stools, the outdoor sofa. Buyers picture themselves there, and that is what makes them call.
- The money detail. Stone, tile, hardware, the spa spillover, the edge of a countertop. One or two close shots that show quality.
- Lights on. Outdoor jobs at dusk with every light on. Indoor jobs with the pendants and under-cabinet lights on. This is usually the best shot of the set, so it goes near the end.
Already took the handover photos and missed a shot or two? That is fine. A Reel works with 6 shots, and the wide, the hero feature and the lights-on shot do most of the work.
Step 3: Put the shots in story order
A pile of nice photos is not a Reel yet. The order is what makes people watch to the end. Use the order a guest experiences the job: the best angle to stop the scroll, then the walk in, the feature, the place to sit, and the big reveal at the end.
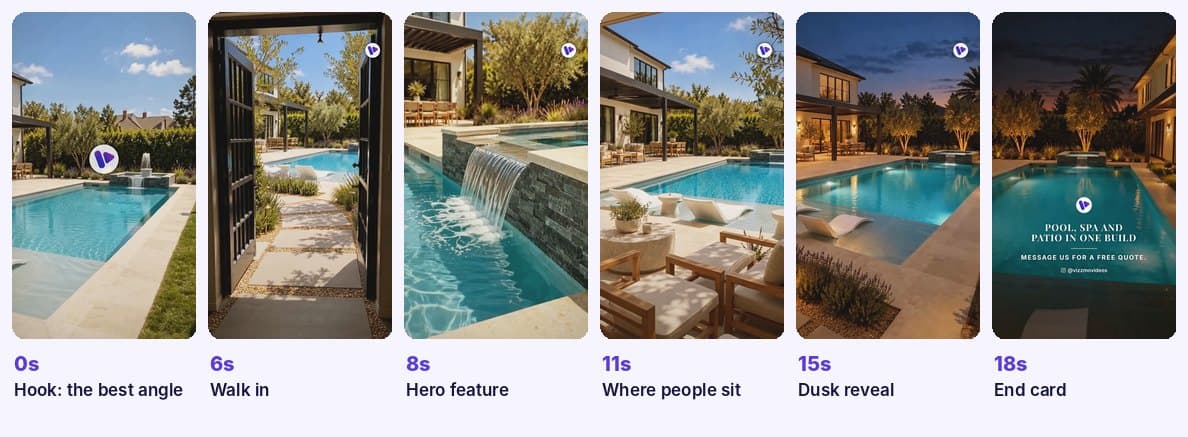
- 0 to 2 seconds, the hook. Your single best shot. If people do not stop here, nothing else matters. Never open on your logo.
- The walk in. The way-in shot, so the viewer arrives at the job.
- The hero feature. The thing that makes this job different.
- Where people sit. One or two shots of the spaces people use.
- The reveal. The dusk or lights-on shot. Save your second-best photo for here.
- The end card. Two to three seconds that say what this was and what to do next (Step 5).
Each shot gets 2 to 3 seconds. Fifteen to 25 seconds in total is the sweet spot: long enough to show the job, short enough that most people watch twice, which Instagram counts in your favor.
Step 4: Add movement to every shot
A slideshow of still photos looks like a slideshow, and people swipe past it. What makes a reveal feel like a video is that every shot moves: a slow push in toward the waterfall, a pan along the pool edge, a glide through the gate. You have two ways to get there.
Option A: do it yourself in CapCut
- Open CapCut, start a new project and set the canvas to 9:16.
- Import the photos in your story order.
- Set each photo to 2 to 3 seconds.
- On each photo, add two keyframes: one at the start and one at the end, with the photo slightly bigger or moved at the end. That is your push in or pan. Alternate directions so it does not feel repetitive.
- Use simple cuts between shots. Skip spinning or flashy transitions; they make a high-end job look cheap.
- Add a music track from the app's library that is cleared for business use, and trim it to end with the video.
- Add the end card (Step 5) as the last 2 to 3 seconds.
- Export at 1080p, 30 fps.
The first one takes most contractors one to two hours. After a few you will be at 30 to 45 minutes a video. The result is a good slideshow with motion. It will not have real camera movement, because keyframes only zoom and slide a flat photo.
Option B: have the photos turned into moving shots
This is what Vizzmo does. AI turns each photo into a short moving shot, so the camera glides through the gate and the water actually falls, then the shots are cut in story order with music and your end card. A person checks every video before you get it, and nothing is added that is not in your photos. Watch the example below: it is the same pool from the shot list.
Step 5: End on a card that gets the call
The last 2 to 3 seconds are where a viewer becomes a lead. Most contractor videos end on a logo, which tells the viewer nothing. A good end card answers three questions in big, plain text over your best shot.
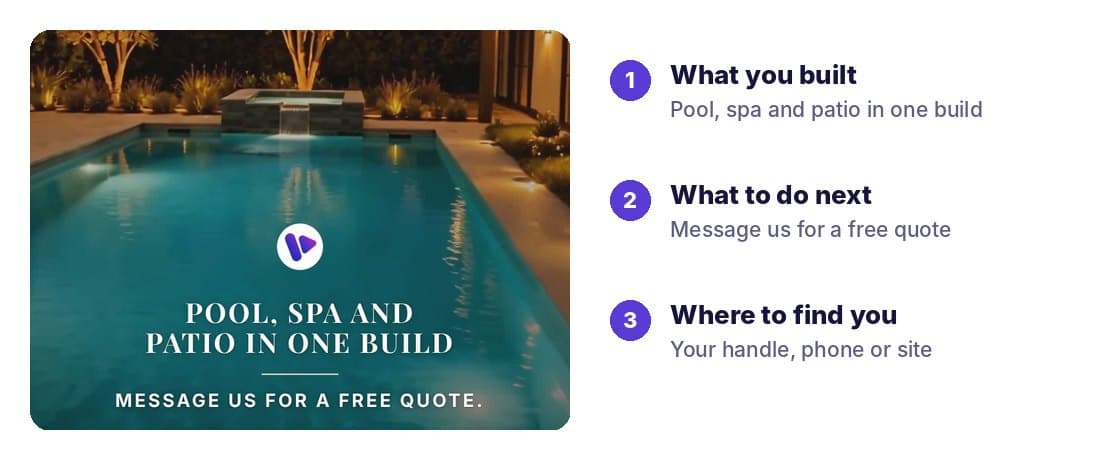
- What you built, in the words a buyer uses: "Pool, spa and patio in one build", "Full kitchen remodel", "Paver patio and fire pit".
- What to do next, one action: "Message us for a free quote" or "Call for a site visit". One, not three.
- Where to find you: your handle, phone number or website. Keep the logo small.
Step 6: Write the caption and post it
The caption is where Instagram and Google learn what the video is about and where it is. Use this formula:
- Pick the cover frame yourself: the wide or the dusk shot, never the end card.
- Tag the client if they are happy to be tagged, and send them the video file. Their share is the cheapest lead you will get.
- Post when your local homeowners are on their phones: weekday evenings and Sunday afternoons usually beat mornings.
- Post it as a Reel, not a Story, so it stays on your profile and keeps reaching people.
Not sure which hashtags to use? The free contractor hashtag generator builds a set for your trade and city.
Step 7: Use the same Reel five more times
You made the video once. Now put it everywhere a buyer looks:
- Facebook Reels. Share it from Instagram or upload it directly. Many homeowners who never open Instagram still scroll Facebook every day.
- Google Business Profile. Add it as a photo and video update. It shows up when someone searches for your trade near them.
- A small ad. Boost it to homeowners within your service area for $10 to $20 a day. A finished-job video is the cheapest ad creative you will ever have.
- Your website. Put it on the service page that matches the job, instead of a stock photo.
- Your estimate follow-up. "Here's one we finished last month that is close to what you described." Nothing closes a quote like their own project, finished, on someone else's house.
Do this for one job a week, or one a month if you are a pool builder with longer builds. A year of reveals is a portfolio that sells for you while you are on site.
The checklist
- A finished job you want more of, and the client's OK.
- Six shots: wide, way in, hero feature, where people sit, money detail, lights on.
- Story order: best shot first, reveal last, end card after.
- Movement on every shot, 2 to 3 seconds each, 15 to 25 seconds total.
- An end card with what you built, one action and where to find you.
- A caption with the job, the town and the action, posted as a Reel.
- The same video on Facebook, Google, a small ad, your site and your follow-ups.
Questions
How many photos do I need for a Reel?
Six is the minimum for a full story, and 8 to 12 is better because it gives you a choice of the best angle for each shot. More than 12 makes the Reel too long; pick the best.
Do the photos need to be vertical?
No, but it helps. Horizontal photos work if the subject is in the middle with some space around it, so they can be cropped to 9:16 without cutting off the feature.
Can I use before photos?
Yes. Open on the before shot from the same spot, then cut to the wide after shot. The transformation becomes the hook. The free before and after template does the same thing as a photo post.
How long should a contractor Reel be?
15 to 25 seconds. Long enough to walk through the job, short enough that most people watch to the end and many watch twice.
What music can I use?
Use music that is cleared for business accounts: the commercial library inside Instagram or CapCut, or a royalty-free track. Popular songs can get a business account's Reel muted. Vizzmo videos come with royalty-free music already in.
How much does it cost to have someone else make it?
A videographer typically charges $500 to $1,500 per shoot, and freelance editors often charge per Reel on top of that. Vizzmo makes the Reel from your photos: the first video is free, then a flat monthly plan or a single video price.